
Van Gogh’s Room
For this project, I am going to create a VR scene of a recreation of one of Van Gogh’s Paintings.
Van Gogh’s Room
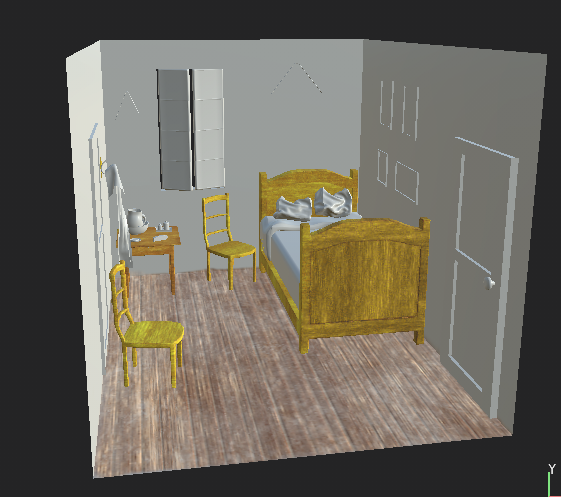
The painting I decided to use to recreate is Van Gogh’s Room in Arles

Reference Images


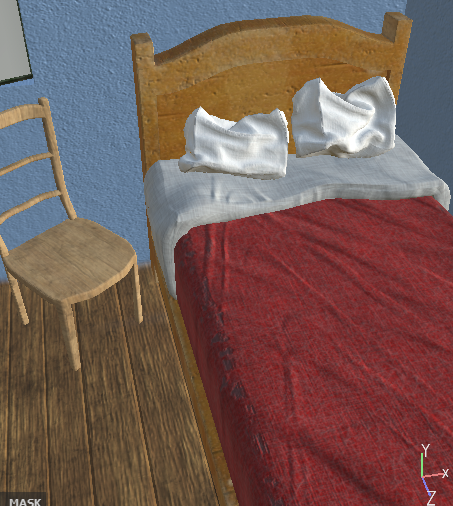
Modeling
First, to start off I took a bunch of images I got online of different angles or different recreations of the room to use a reference and started to make the objects in the room
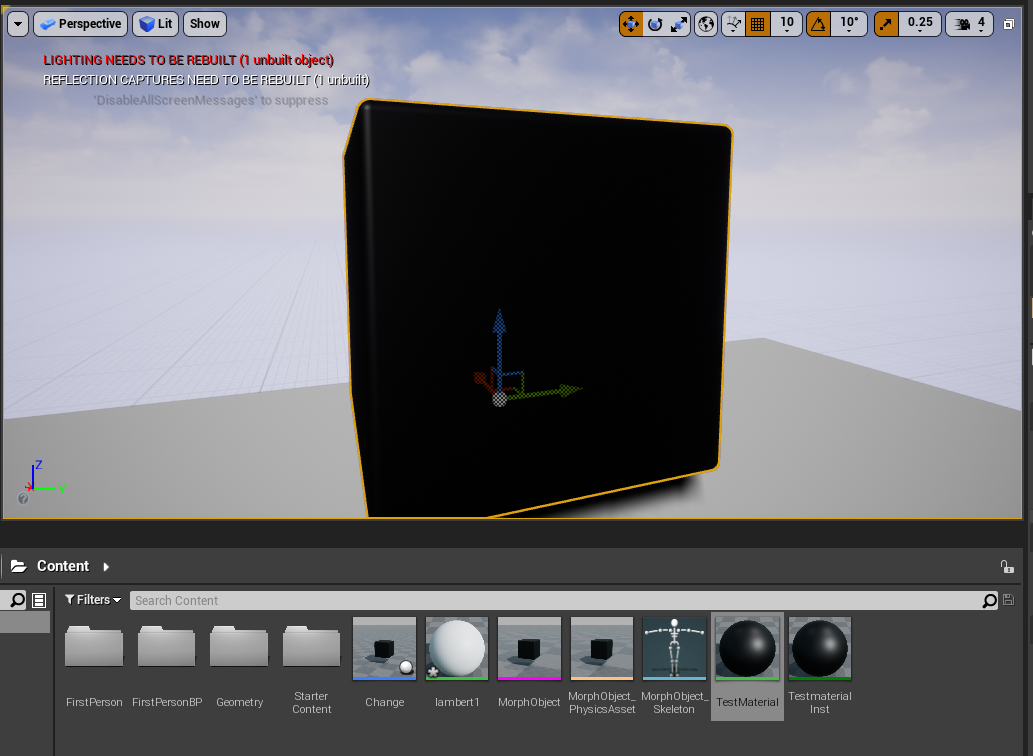
Changing color through Widgets
For my project, I wanted to change the material of the object from a realistic to a stylized impressionist painting material. To achieve that I started testing on doing widgets and getting the color to change according to the widget.
Setting up the widget and getting it to work
Widget creation
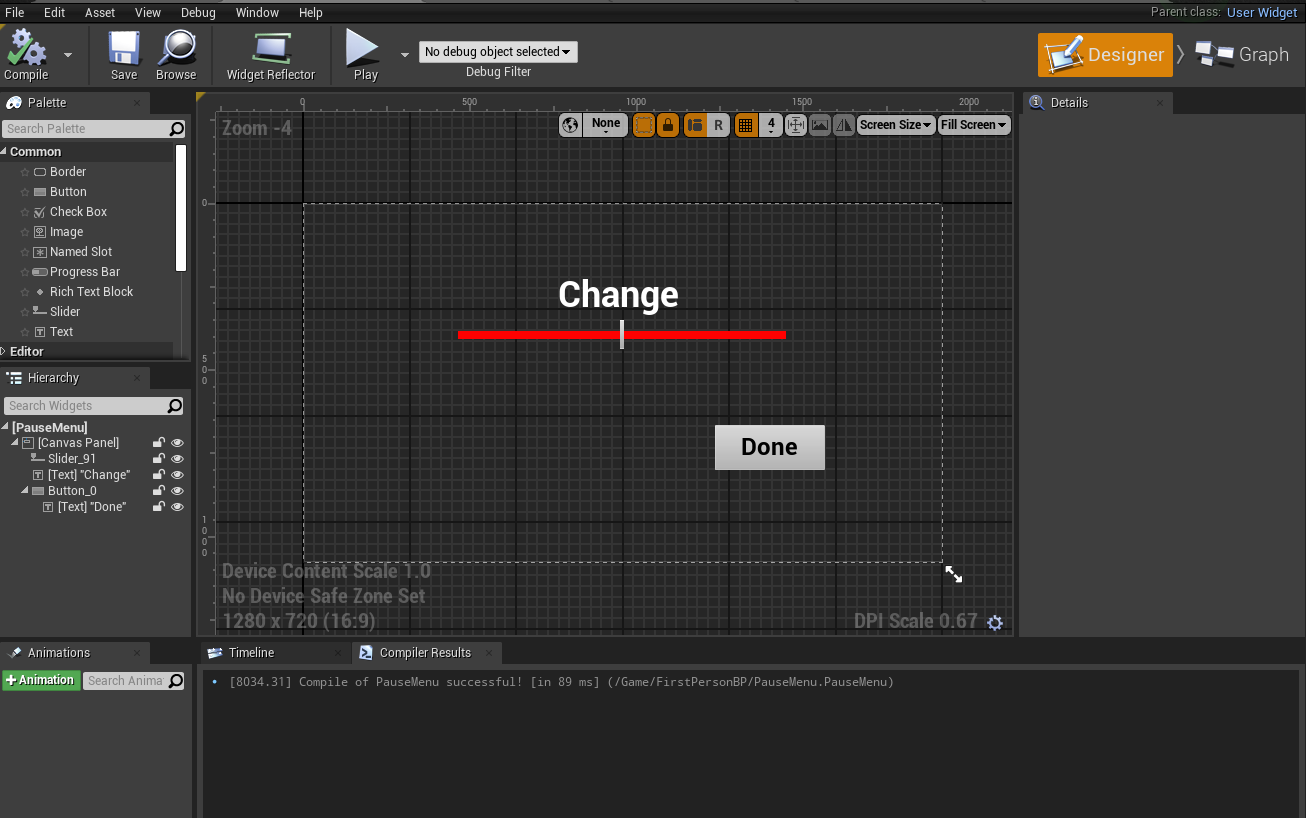
For my test for the widget I wanted to make sure it had a slider and it can output a number from 0-1 from that slider.

Key Function
Then I added a key function so that the widget would be able to open up and close by pressing a certain button. For my button I choose M but this key can be any key. Once the key is pressed your mouse cursor will show up along with the option to move the slider from left to right.
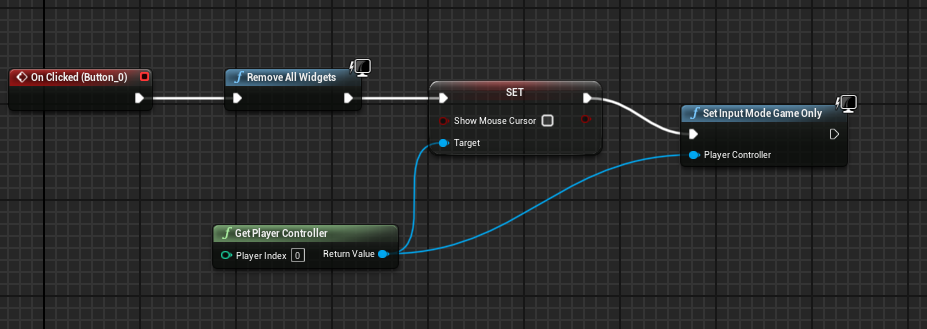
Done button
Then to close the option I made it so that once you are happy with what it is you can press the done button the cursor goes away and you can move again.
Adding change in Material

For the Material change, I made a simple setup to change the color only but this method can be used for specular, and other options. To start with I made an actor class, a material, and the instance of the material
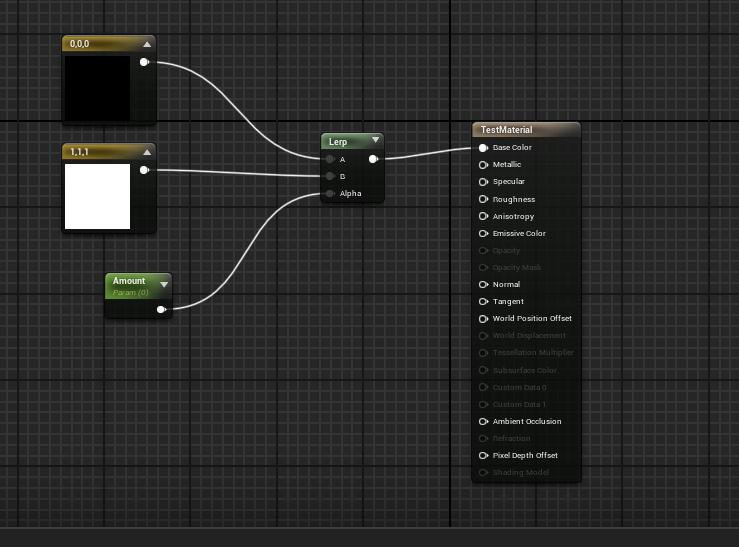
Dynamic Material Instance

Then for the the change in color I made the material into a dynamic material instance and made it so that the parameter in the material would reference
the variable that the slider gave, thus leading to the change in the color between the two.
The result
Thus giving a result looking like so.

Blend Shapes/Morphs in Unreal

Maya Blend shapes
To start with you create blends shapes in Maya and export them

Import into Unreal
Then when exporting into Unreal engine select skeletal mesh and allow import morph targets

Go into actor class and add
Then once the mesh is imported you change the mesh on the actor class to get the morph to work with the change.
The result
Editing Blueprint to make morphs work

Change shape on the blueprint
First to make sure that the color change will work on the new object I added a reference to it so that my object would be referenced when the color change occurs. This should be done in the class actor blueprint

Add morph when the slider moves
Then on the slider event add a set target morph between the dynamic material change, and rename the skeletal mesh to what the name of the skeletal mesh is. In this case my skeletal mesh was pCube4
The Result
By doing the things above I should be able to change the textures, and morph the objects anyway I want

UVing and making sure everything works

Complicated UVs
For the uving I started by making sure that I start by trying automatic UVs for the objects that are complicated but then I would go into them and fix the UVs so that they would wrap around each other better

Simple UVs
For the simple objects, I made my uv’s by manually going to the edges and cutting them
Substance painter
Colors

Reference
I wanted to make sure that I got the right variations in the colors so I made my colors using the painting as a reference
Adding the colors
When making the colors I used substance painter to color them and when making the colors I used the various grunge on substance painter as a mask to get my color variation. I also realized that the way that it is painting makes the lines look vertical.
To get the edges to be lined like the painting I’m thinking of baking my textures and using generators to just take the edges of the object and make them all the same color to get the line.
This is the finished paint version. For the paintings, I am thinking of putting in the real photos later using photoshop.
Behind the painting
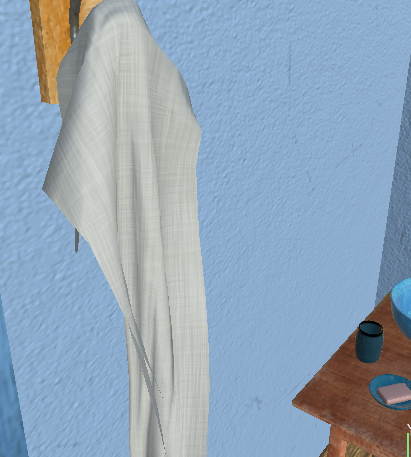
For what is behind the painting I decided to put on Van Gogh’s art supplies or the supplies he would use to paint. I watched “Lust for Life” which is a Biopic about Van Gogh to see the supplies he would use.


Morph and Modelling
I started modeling the painting supplies and morphed the scene to change the perspective of the objects. For the objects because it will mostly be the same texture on the paint I made it one UV.


Bake materials and curvature
To finish the textures I baked the materials and used a curvature generator to get the final lines on the textures.
Adding Substance into Unreal

After finishing the first textures I then started a rough draft of my camera movement
After finishing the draft render I went back and made sure that the objects would morph and change color by making one of the materials a material instance.
Testing
Real Textures
Then I started working on the real textures. for the Real textures I decided to bring up the texture quality and make my textures even more detailed.
Taking substance export into Maya

For the realistic textures to have them work in unreal I used lerp and a parameter the same as my testing to have the change in textures. Then I went back to the blueprint and added all the dynamic materials I would need for the file

To finish it off I added the ability to allow changes to occur within the textures in the same way that I tested it.
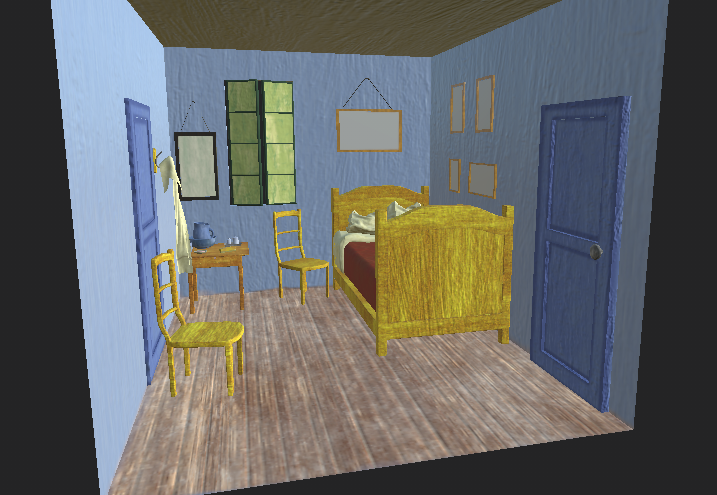
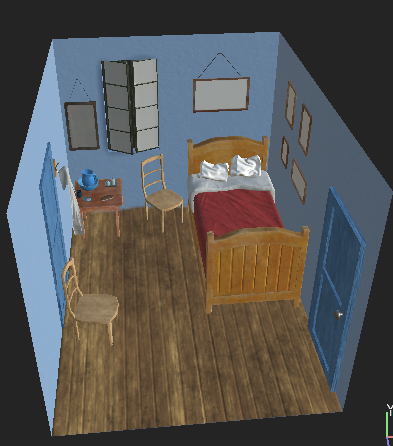
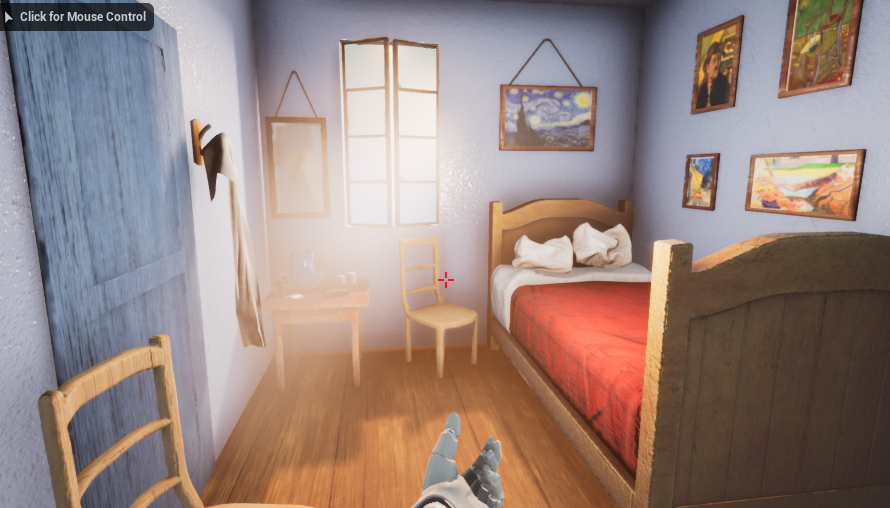
Lighting
Then after getting the textures that I want in. I decided to later add the first edit of the lighting in the scene. Later on, I would do more post-processing and get the lighting and the atmospheric lighting to come out the way I want. For some reason, the textures that I had would become a lot brighter than they should in some areas which I would go back in substance to change and make better.


Adding more to the scene
For the back of the room, I added more paintings that Van Gogh painted, Gauguin, and Hokusai painted as it would make sense since these three are paintings that would have been important to him and had an effect on his life.
While the paintings probably are not things that he would have owned in his room I think putting them in would make sense to put in.

Then I went and fixed the reflection problem I had in my scene by putting in a planar reflection in the scene allowing for the mirror to show the things in the room
Then I went back into the video and fixed the problems I had with getting the shape and color of the room to change.
Adding post-processing and volumetric lighting
To get the lighting to look right I started doing more work inside the post-processing to increase the contrast of shadow and highlights in the scene, and also decrease the saturation. After that, I added a quick volumetric light to see how it looks

Getting everything into VR
Problems
To start with I started off with the wrong Template which made most of the inputs and functions that would otherwise be able to be used in VR not work. At first, I tried to make the new template and make everything again but when I was nearly finished I realized I could have just migrated the project files over which was what I did later on.


Because I had to migrate my projects I added new inputs that would work in VR
The open Menu input will allow the users to open the pause menu with a button
The select R and L allows the users to use the inputs to select as if they were using the left mouse button
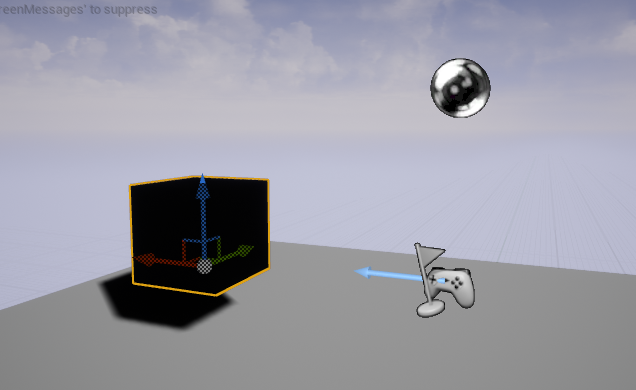
Then after that, I added a new actor class and added a 3D widget to it that licks to the pause menu widget that I previously created


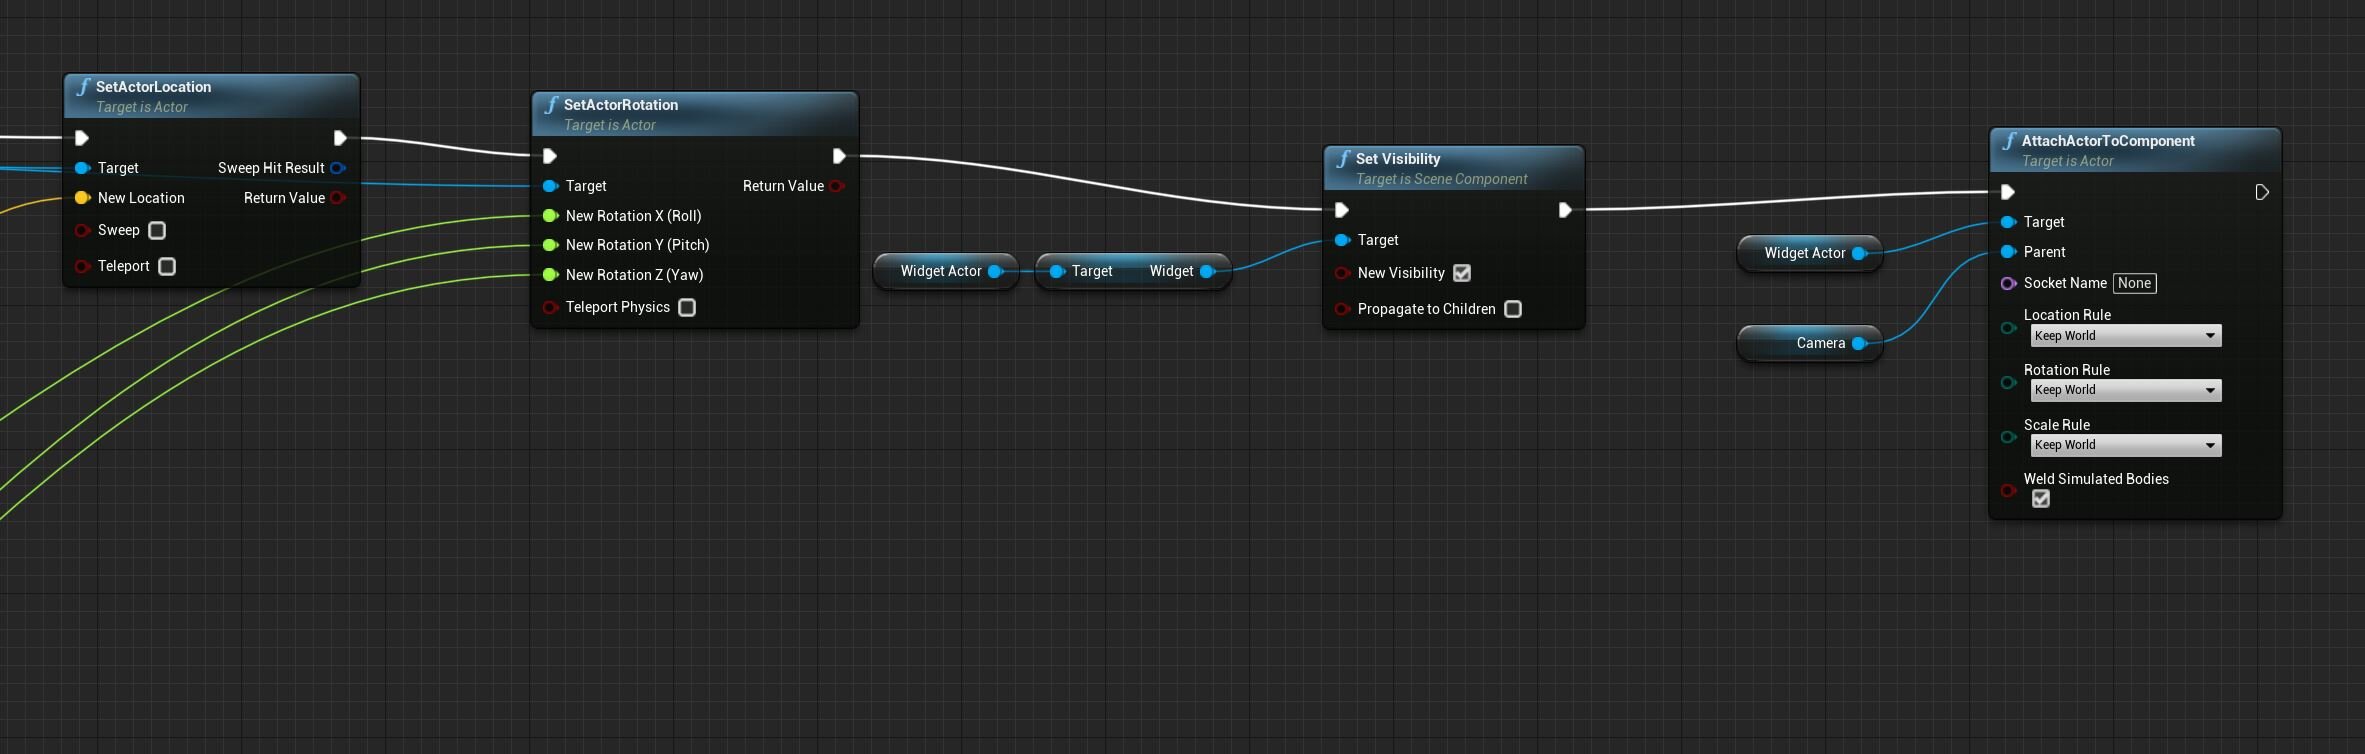
For the Images above. This was the code I put in under the MotionCotrollerPawn class so that when the user puts in the input buttons they can open and close the menu
The last 3 images are the code for projecting a menu in front of the user that will move according to the way the user moves and rotates his head, by tracking the location and rotation of the user and linking the 3D widget to it.
After this, I had to do 3 things to make this menu work
Menu clicking and interaction

Adding widget interaction
To start I added a widget interaction that is linked to the hand under the BPmotioncontroller This will allow the hand to interact with the 3D widget.
I also added a debugging line so that the user can see where the pointer is pointing to

Clicking and release
Then I added a code that would allow the input for clicking to simulate what would be the click of a left-click on a mouse. So that the widget can be clicked on

Left and right clicks
Then to finish up I added code so that the input will connect to the right hand and is able to click and release.

Lastly, I had to change the way the pause menu works as for the new code instead of closing the menu it destroys the actor that the widget is made from so the variables cannot be saved.
To fix this I tried many different methods such as trying to get a global variable, saving the variable in the motion-controller pawn class.
but the method that did work was getting the variable from the value from the morph target which does not get deleted because it is part of a different class. So I just made the slider into one slider that changes both color and shape.
Finalizing with breakdowns
Finally, I added everything in the project together and did a little bit of tweaking with the height of the actor, and adding a Quit game button. If you want to try it out the project currently works with the HTC Vive, the oculus