Temple in the moutains
Basic concept
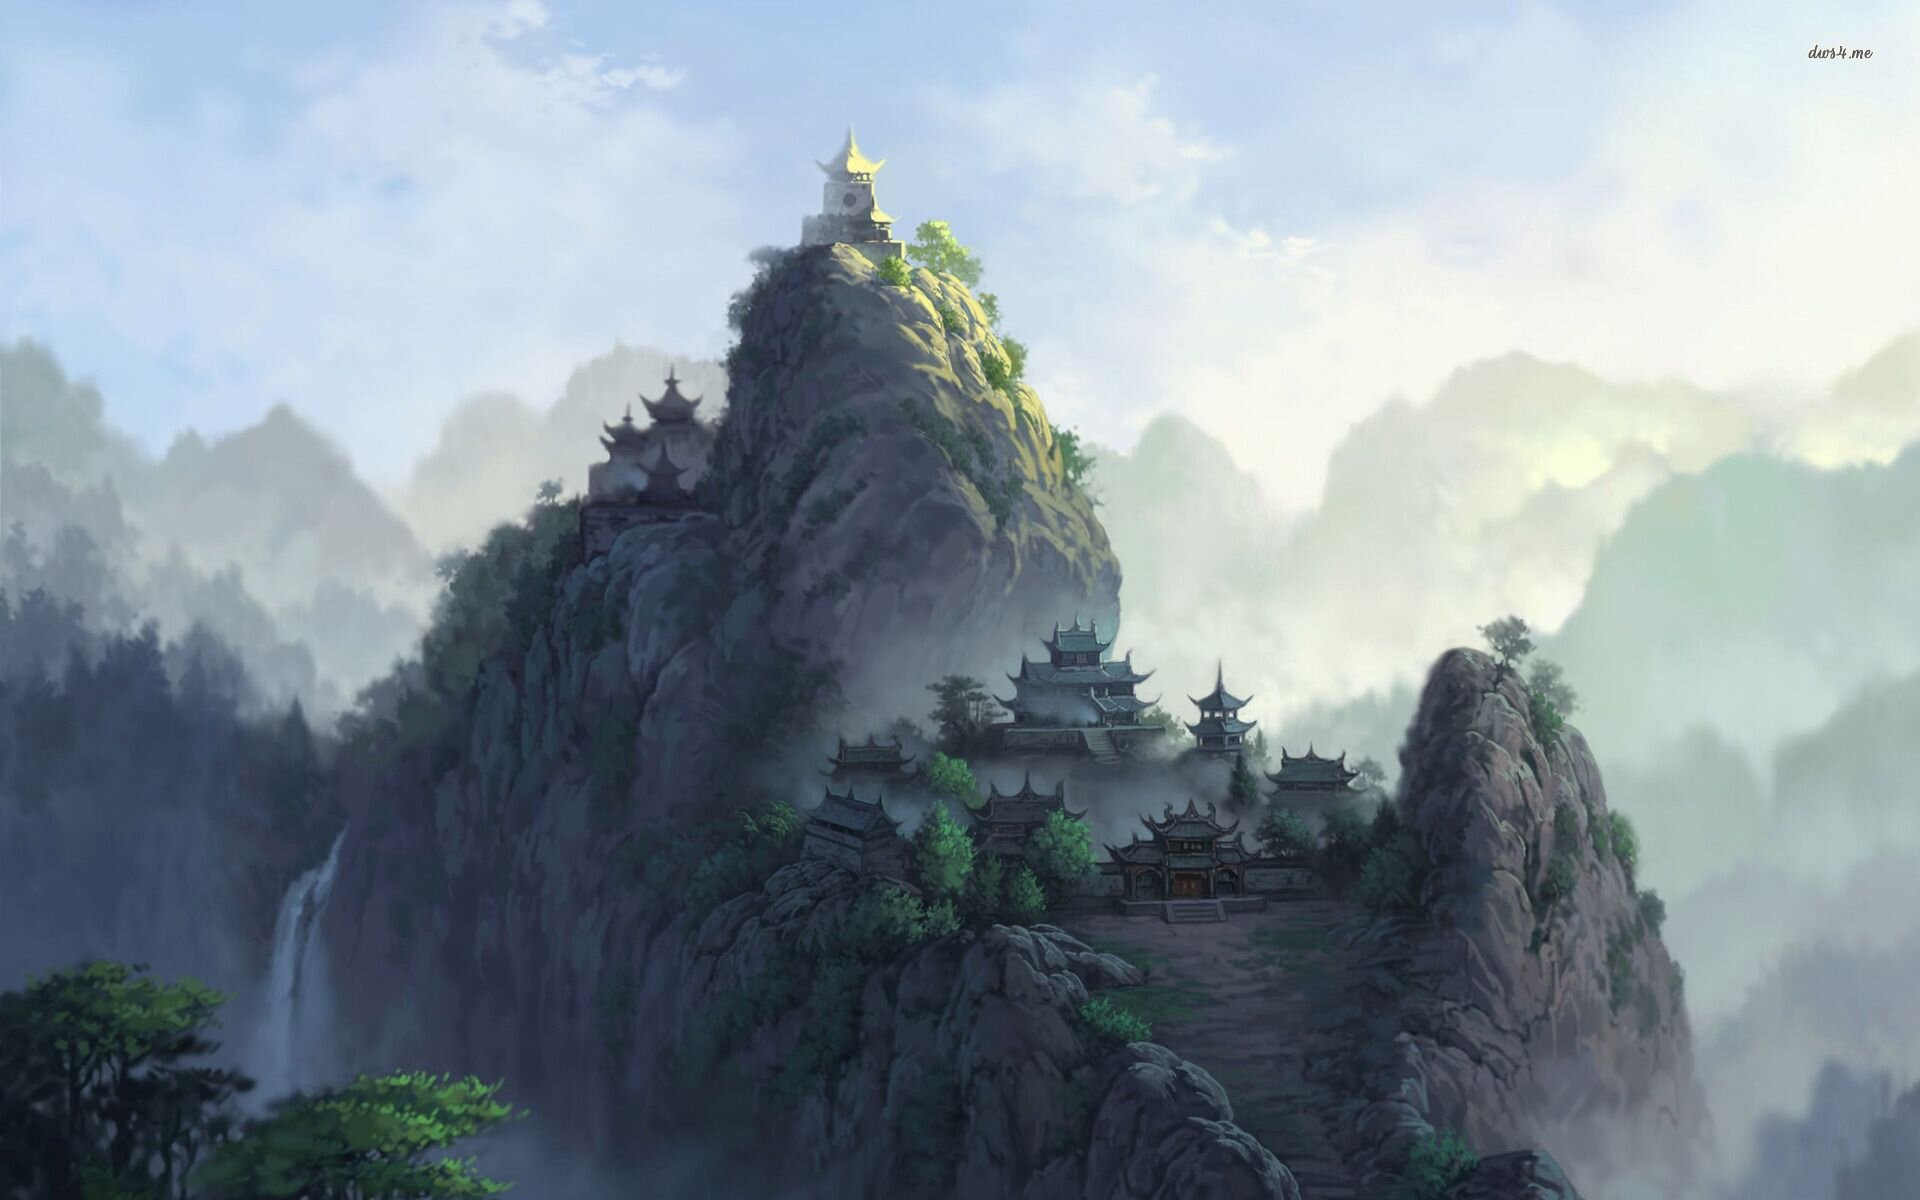
For this project, I want to create an environment of a hidden temple in the mountains and show it through using AR.
References


Getting a clearer idea
I think that while an environment will be interesting I would want the environment to come up from the ground so that it would be more interesting. Looking at other videos of the things people do in AR I think that I really like the idea of having things move around in the scene to create somewhat of a story. Specifically looking at the Wingnut AR Unreal Engine Demo on iOS in WWDC 2017 I really liked the idea of having a scene being played out and you can see it in AR.
I will do a looped animation as it will be too hard for me to do a complex animation. I think I will be using simple looping animation for my project. I think I will do a huge mist that is gradually uncovered, showing a temple hidden in the mountains.
Using Unreal’s AR tool kit
To start with this project I started learning more about Unreal’s AR tool kit and what kind of things I can do within them. So I made an unreal project with the AR toolkit template. Then I looked up lots of tutorials and demos of some things people do to give me an idea of what I need to do to start.
Here are some of the tutorials I looked at:
https://www.youtube.com/watch?v=xi1u287Kyhw&ab_channel=UnrealEngine
https://www.youtube.com/watch?v=KY0Rk7Ya4FQ&ab_channel=DevEnabled
These two helped me understand the basic for placing objects. I think that once I get a demo out of placing an object I will start to move on to doing placing animated objects.


blocking out for when the models come in
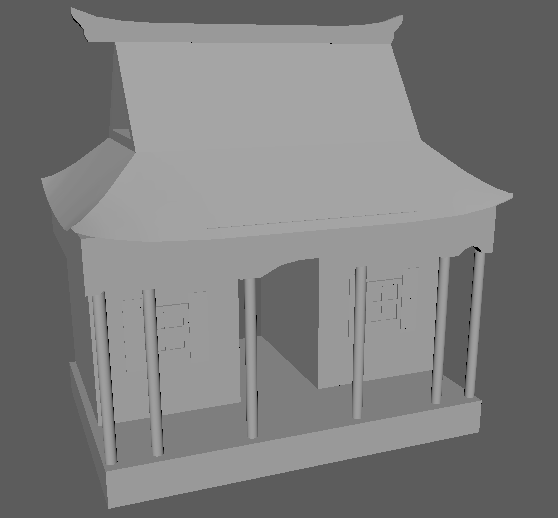
Then I went into Maya and started to block out a brought draft of what the model will look like. This is to get a sense of scale and an overall feel of what the final model will look like. Once the models come in I will then replace these with the model

render test
I then got the models and did a test to see if I could get the models working in ar with the ar template in unreal. I had a lot of technical issues getting my phone to work with unreal so there was a bit of work there that halted my progress but I got it to work.
Models
Initial models
Then I got some of the models from the modeler for the buildings.
Next step for modeling
The next step is to get the rest of the buildings and the model for the bell and gate
Working more in Maya

Reduce poly for optimization
considering the lag in the last video, I decided to reduce the polys in the scene and have the bumpiness of the mountain be done through the textures.

Assembling new assets
I also took the new assets I got this scene and added them together. Next is to get the textured version of each building and put them into unreal.
Set dressing

Buildings
I decided to set up the buildings just to see what it would look like when I do receive the mountain model.

Mountain model
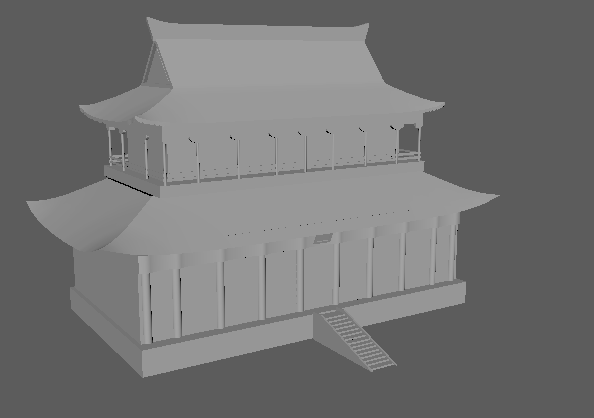
After getting the mountain model in I then redid the models and added everything together for the final look of the ojbects

setting up again
After getting the mountain model I then redressed the set with the new models and moved around the buildings to fit better with the new models
Pillar progress

Reference
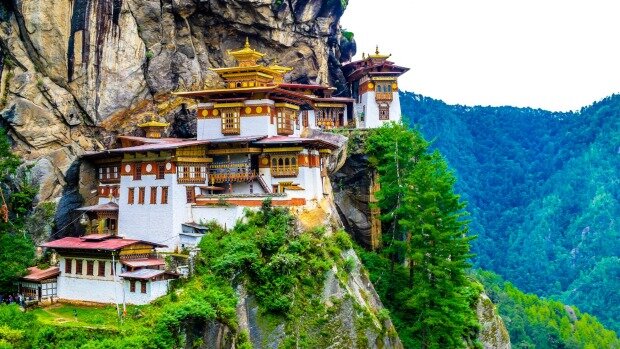
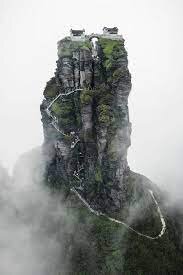
For the initial look I went to look at references that would show and give me an idea of what kind of look the pillar will have once it is completed
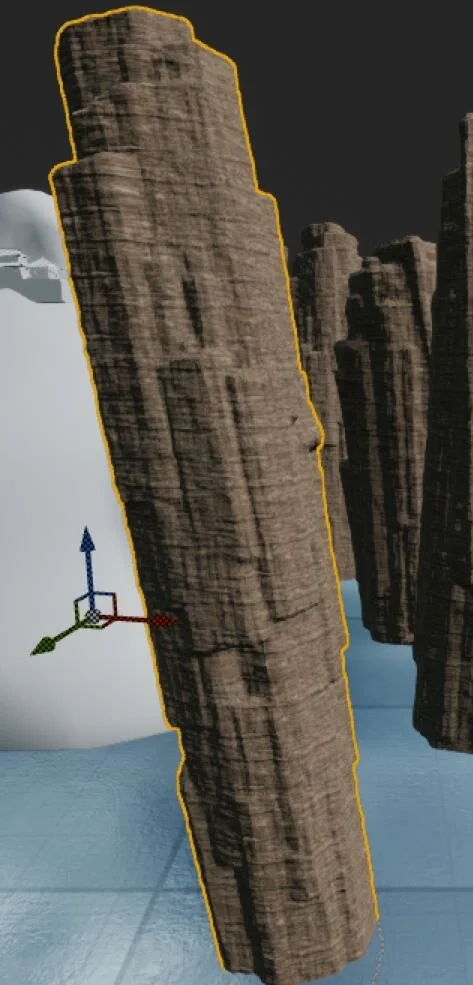
Base color
I then used a quixel texture on the pillar to get the base texture and material I want for the pillars. I also went into the instance and changed the parameter to make it lighter so that the pillars would be the same color as the reference


Update on the textures
For the texture on the buildings, the texture that I am working with gave me a render in unreal of their building which I will be using for my scene
I then told them to change the roof color as it does not really look too well when I imagined it with the pillars and on the mountain.
I also told them to add a white for the windows so that the building would not look so flat.

Scaling up the buildings
I then scaled up the building so that it would look bigger and become something that stands out more

Spawn once
For the mountain to come in I decided to add a code into the original template that will allow the scene to see if the object is already in the scene if it is then the object will not spawn again.

I then went into Maya and added foliage into the pillars and mountain

Draft with all assets in
Looking at the video I think I might need a bigger device to shoot this in as the phone screen is pretty small for it to work well. I also want to work more for the material in the foliage as I did not have time to put that in yet

Mat rollout test
I then did I quick mat roll-out test to see and to test out the animation of the mountain rising up. I might for my next test just scale it u p on the z-axis in unreal so that it will look more like it’s coming up than expanding.
I also need to adjust the mat position it’s off due to the way the mountains scaled will be fixing that too

Lighting test
I then tested out how the lights will come out with the code that is in the scene. looking at it the light seems to be working on the objects themselves but shadows aren’t showing so I’ll be checking that.
I also got the rollout animation to work with the scene. Added a scroll to make seem more asian.
Making tansition material

Material function
I decided to rather use a material transition with opacity instead of changing the object itself. to achieve this I created a material function that will transition from one material to another.

Applying the function to blueprint
I then went into the material blueprint and added the texture that I would want. I then attached the material function to the opacity map. attached to that I used a bounding box based 0-1 which will allow the material to transition with a wipe. with the scalar parameters, this allows me to control how fast and how blurred the transition would be

Result
with everything in this is how it turns out
Shadows and how to get them
For the ar template by default, the objects don’t cast a shadow for the ground or on the other objects. To solve this problem I mainly working inside the blueprint and the object classes to get shadows and objects to cast them.

The template
For the AR template, the original code uses an actor class that is referenced by the pawn class to put onto the scene and with a material that makes the shadows look like contact shadow.
For my scene I wanted shadows to be cast realistically so I decided to change the way the shadows cast.

Because of how it was set up, I first looked at many tutorials on how to get realistic shadows. Out of all of them, it seemed like they were referencing the passthrough camera material, which by default was in my plugins but could not be referenced. I figured out why later, which was because I had to set the view options on the content browser on the bottom right of the unreal screen to see plugin content. But the way that I got access to it was through pulling it into my contents folder.

I then instanced the material and allowed checked Use External texture and external texture. so that it can be changed in the reference.
Blueprint

Under Begin play
First I created a Dynamic material Instance that would allow me to reference and change the instance of the material I had on a mesh I created on the ground inside the BP_Placeable blueprint
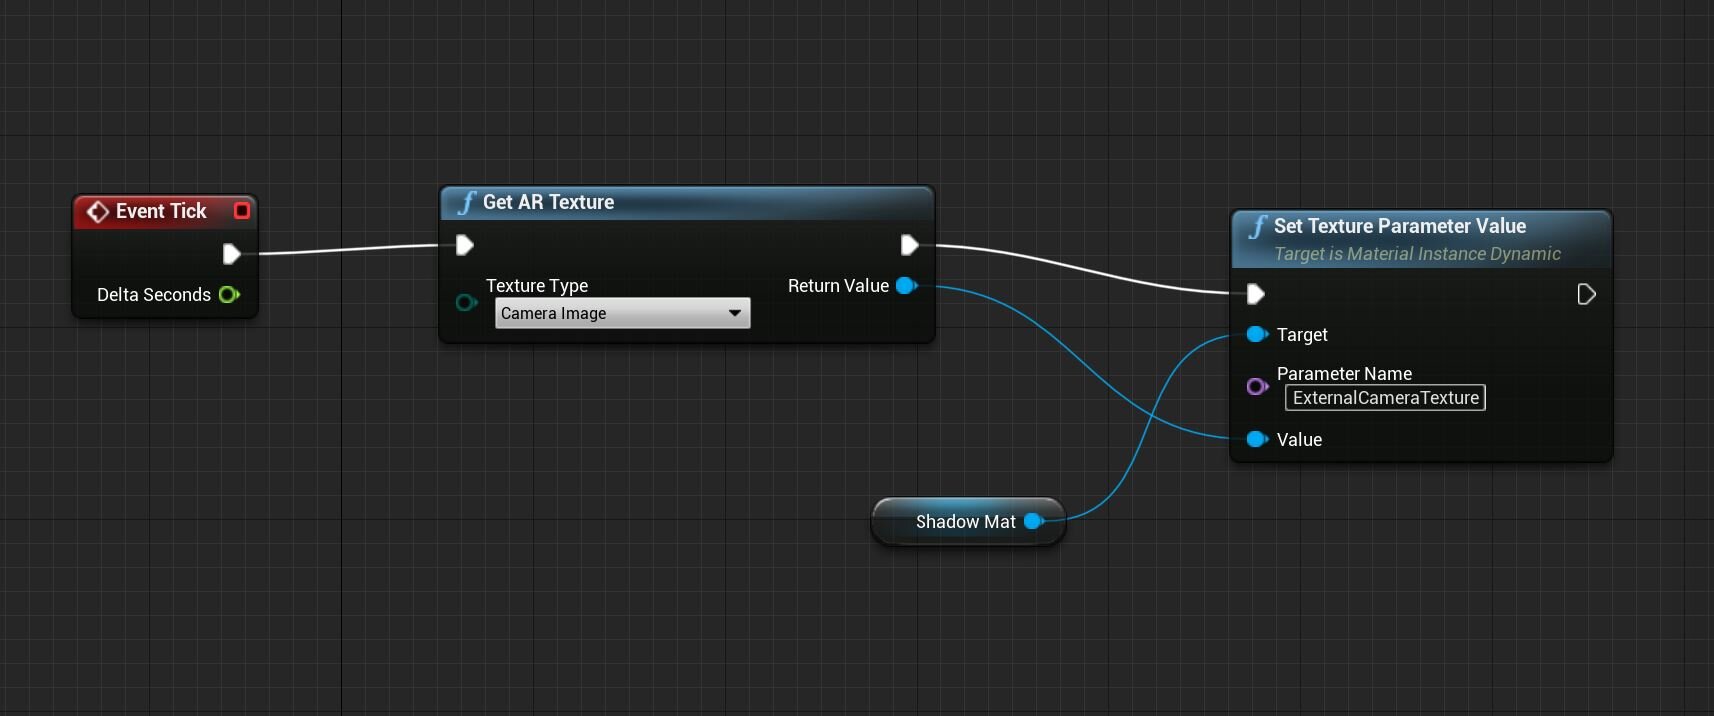
Event Tick
Then I created an event tick followed by an AR texture with the camera image's texture type. This is then connected to the texture parameter value created earlier in the instanced material called ExternalCameraTexture.
This code will allow the plane to update and project what’s on the camera to the ground allowing the shadow to create an illusion to make it seem like it affects the ground.

Fixing Issues
After doing those steps I tested out my scene and realized that regardless my shadows were not being cast, even if the new ground material was working
I realized the problem came to be because the directional light in the world outliner while affected the lighting in the placeable it did not cast shadows.
To fix this I added a spot light into the scene and used that instead to create the shadows.


Issue 2
This kind of led to another problem with was the ground plan would be made to seem a lot brighter in just the size of the mesh.

To fix this problem I changed the screen space pass through material into a default lit material and moved the multiply node into the base color

Issue 3
Now because the lights are not reading the code that changes the lighting according to the estimation I will be going back to it and fixing that.
Also, another issue is that the fps is very low but that’s probably mostly because as of now I have the shadows coming in as raytraced so I will be fixing that.
Optimization
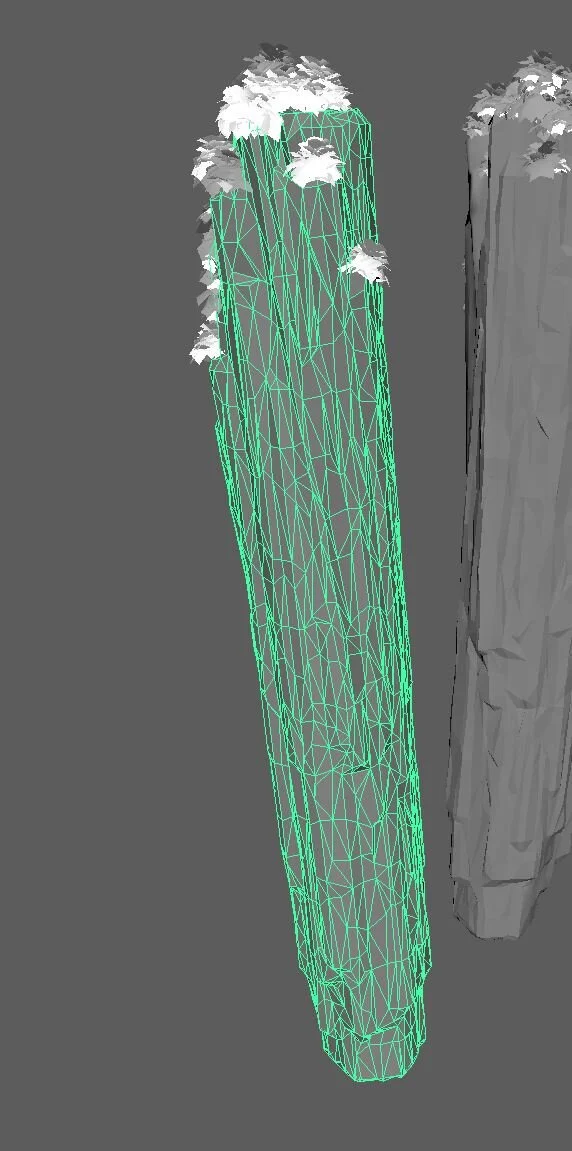
I then went back to the Maya file and reduced the poly count of all the objects in my scene to optimize the scene I tried to reduce as much as I could while not losing too much detail on the model.
Reduced poly count


Deleting geometry for mist
I then went into the mist effect object class and deleted most of the mist and made the ones that were there bigger to cover up the loss for the ones that got deleted.
Result
By doing these two things I managed to get from a limit of 8 frames and lower to somewhere around 10-24 frames. I also tried other things to optimize and after some testing it seems like the materials that I have to the shadows and the scroll seem to cap the frames at 24 frames at most.

Rotating Spotlight


Debug Menu
I first added a new menu to the debug menu of a slider that would allow me to change the value of a parameter


Referencing to Object
Because the Class object will be referenced from the ARpawn class I then had to use to reference the spotlight from the ARpawnclass to get the rotation working.

Set up
Then in the object blueprint, I connected the spotlight to a sphere that would allow the spotlight to rotate around the scene